Workflows
Power Automate Configuration
To utilize Power Automate flows within plemeo.ai, you must first configure the flow details in the settings. With the Create Workflow Button you will be redirected to the Power Automate Website to configure the workflow. Only one flow can be configured at a time.

Required Configuration Fields
1. Workflow URL
This is the URL pointing to the flow to be executed. How to obtain the URL:
- Open the Power Automate Flow Editor
- Add an HTTP Trigger block at the start of the flow
- Copy the HTTP URL from the trigger block and save it
2. Workflow Prompt
This is the instruction that helps the AI understand how to format and forward the input data to Power Automate. Depending on the flow's logic or content, the structure of the request body (JSON schema) may vary.
Once the flow is created, extract the structure of the Request Body and use that to build your prompt.
Example Prompt:
Always respond only in this JSON format: {"recipient": ["string"], "email_subject": "string", "email_text": "string"}. The recipient should consist of all the email addresses in the user input. The email_subject should be a summary of the question. The email_text should be the answer to the question from the chat and consist only of a string. The response must be in JSON.Once the workflow URL and the prompt are ready, enter them in the workflow configuration fields in plemeo.ai.


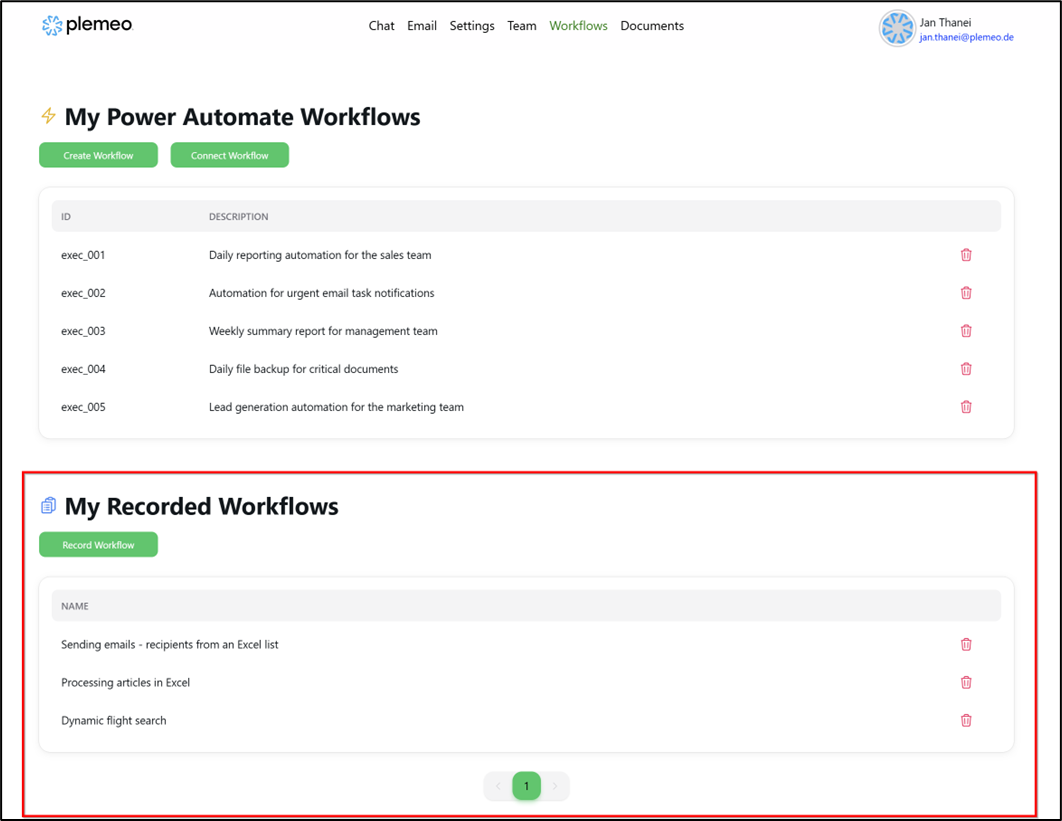
Recorded Workflows
The second type of workflows are recorded workflows. They can be recorded via a special plemeo tool and will be listed here.
Setup Process
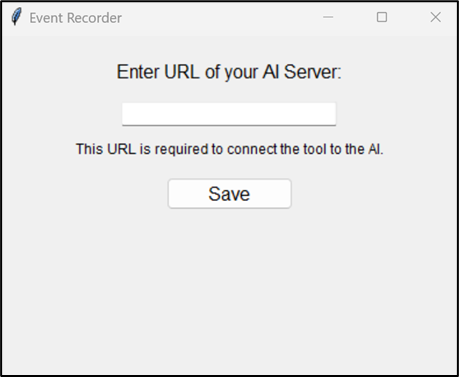
- Download the Tool: The tool can be downloaded from the link you get from your first email from plemeo with all the instructions
- Server URL Configuration: When you open the tool you will have to set up the server URL as first thing (For example: https://ai-intern.plemeo.de/)
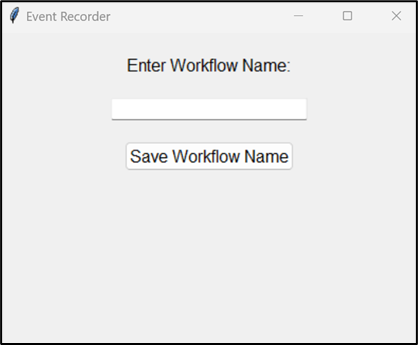
- Recording: Record your workflow using the plemeo recording tool
- Execution: After recording successfully, the workflow will appear in the list
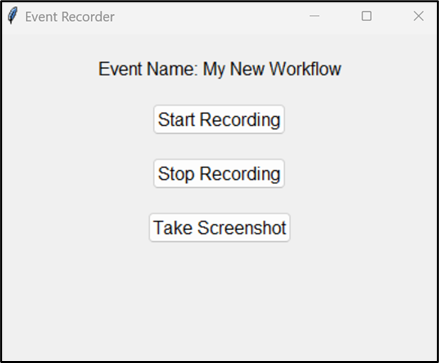
Workflow Execution
To execute the workflow:
- Switch to the Chat Page
- Type in the corresponding command appended with your workflow name
- Example:
/execute My New Workflow
Important: Keep in mind that the workflow tool should be running during execution.
n8n Workflows
n8n is a workflow automation platform that allows various applications and services to be connected together. Using visual workflows, recurring processes can be automated.
For more information, see the official documentation: https://docs.n8n.io
n8n Integration in plemeo.ai
To use n8n within plemeo.ai:
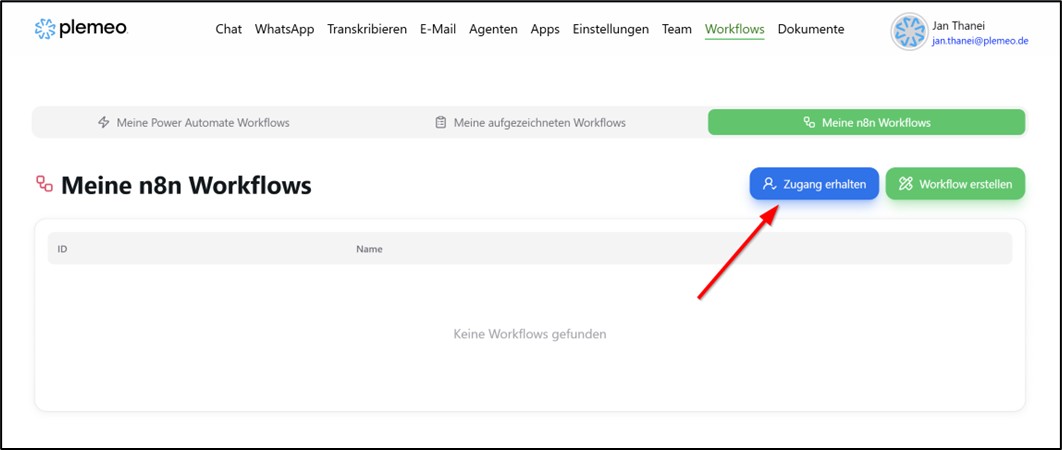
- Navigate to the "Workflows" section and select "My n8n Workflows"
- If you don't have access yet, click "Request Access"
- You'll receive an invitation via email
- Open the email, click "Accept Invitation," and complete the registration form
- After registration, set a password for accessing n8n
- Once registration and login are complete, your n8n workflows are linked with plemeo.ai

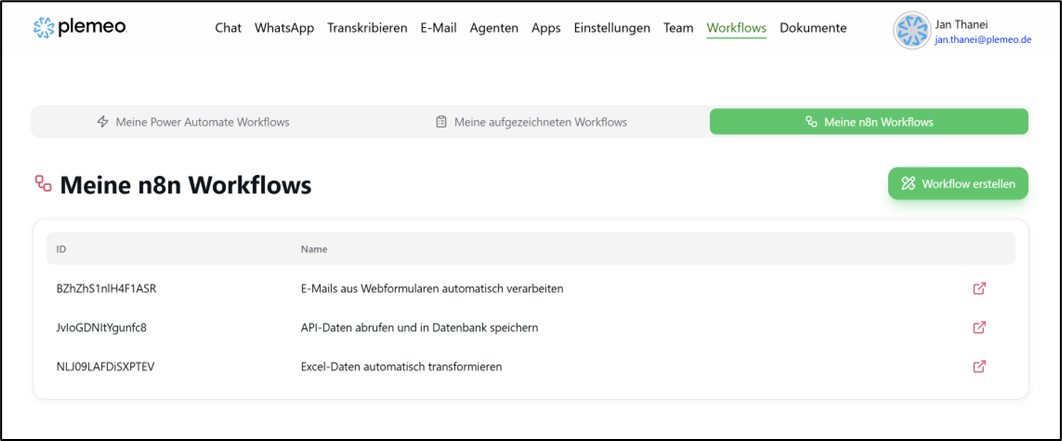
Workflow Management
In the "My n8n Workflows" section of the web app, you'll see all workflows you've created in n8n. New and updated workflows are automatically synchronized.
If you want to manage workflows directly, you can log into the n8n interface. There, you can create new workflows or modify existing ones.

Each workflow in n8n can be activated or deactivated at any time.
Starting n8n Workflows from Chat
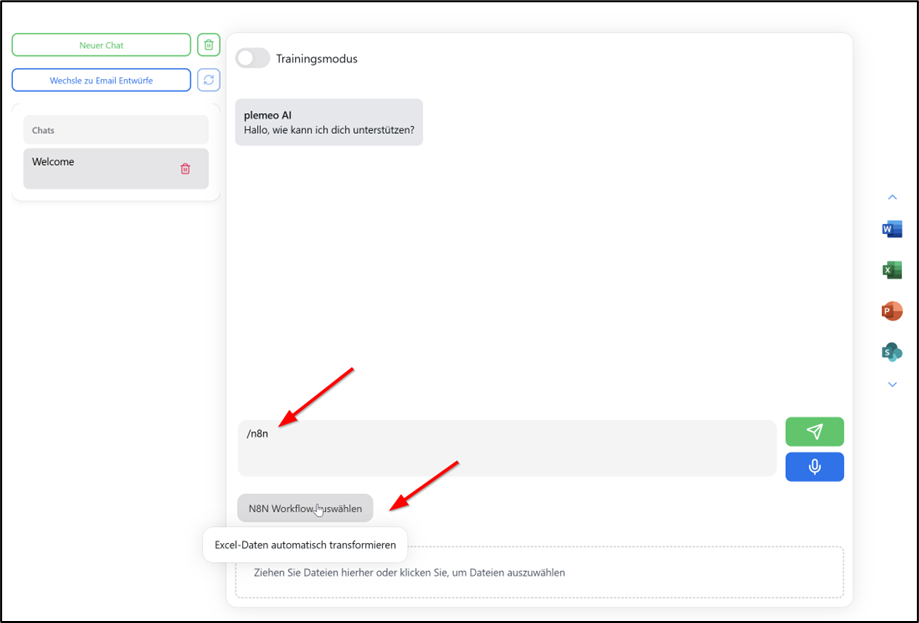
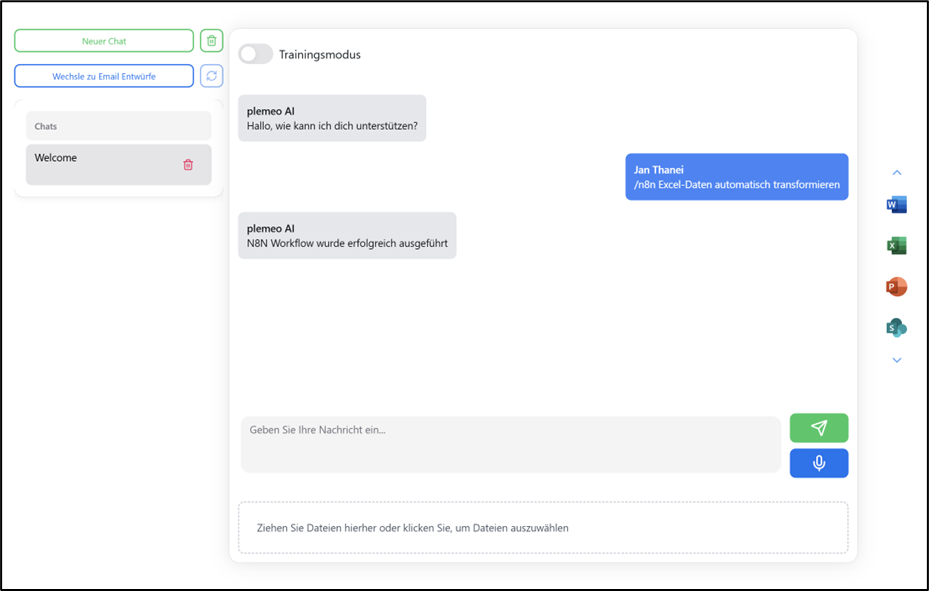
You can also start workflows directly from a chat in plemeo.ai using the /n8n command.
Process:
- Type
/n8nin the chat - A dropdown menu appears showing available workflows
- This list only shows workflows that start with a Webhook Trigger
- After selecting a workflow and sending the message, the selected workflow is executed
Requirement for Chat Execution: The workflow must be configured with a Webhook Trigger as its entry point.
Webhook Configuration Steps
- In n8n, create a new workflow or open an existing one
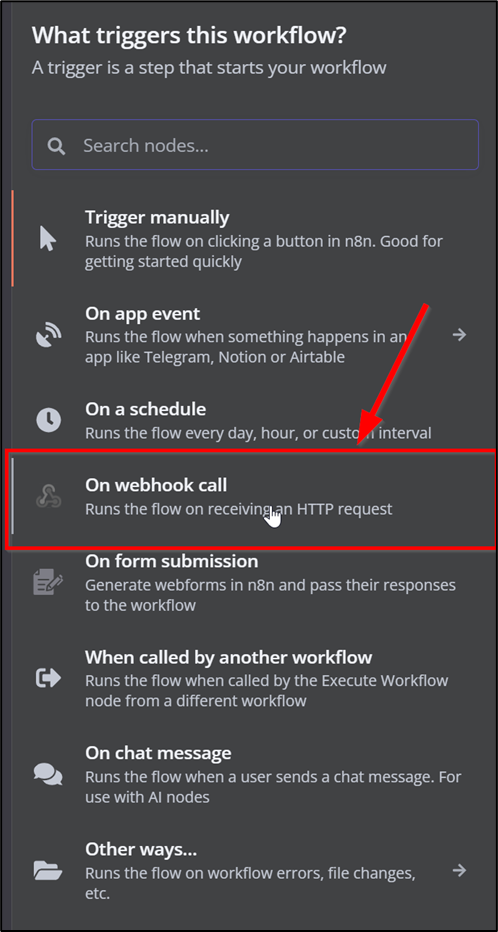
- Add a Webhook Trigger as the starting node:
- Go to the "Add Trigger" menu
- Choose "On webhook call" as the trigger
- This allows the workflow to be triggered by an HTTP request
Webhook Configuration — Important Settings
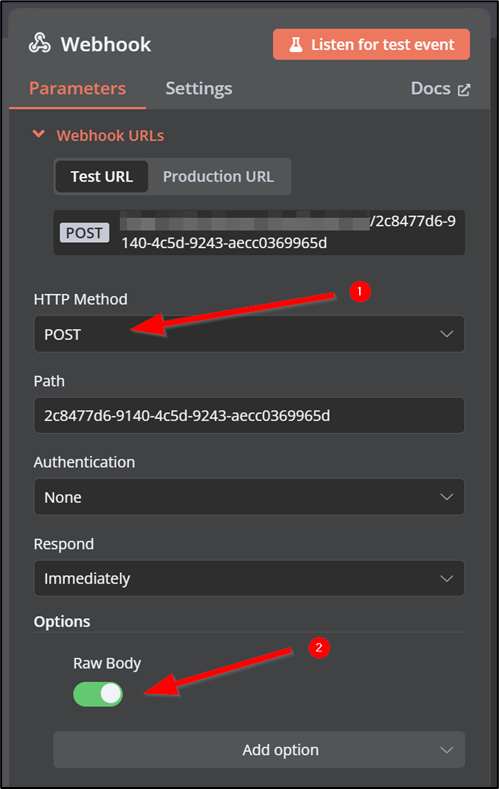
HTTP Method:
- Usually set to POST (default and suitable for most cases)
- For read-only operations, you can use GET
- Use PUT or DELETE for specific API scenarios
Enable "Raw Body":
- Activate this option to forward the entire body of the HTTP request unchanged
- This is important for sending custom input as plain text and processing it directly
Simple Example with Custom Input
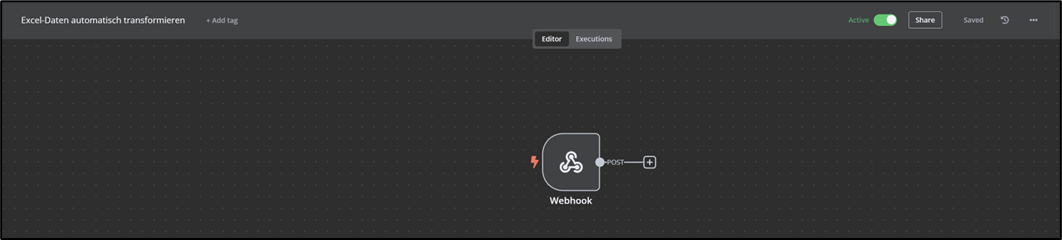
A basic n8n workflow that processes custom input might consist of these components:
- Webhook Trigger: The workflow starts when an HTTP request hits the webhook
- AI Agent Node: Uses an OpenAI chat model to process the input and generate a response
- Return Response: The processed result is sent back to the requester
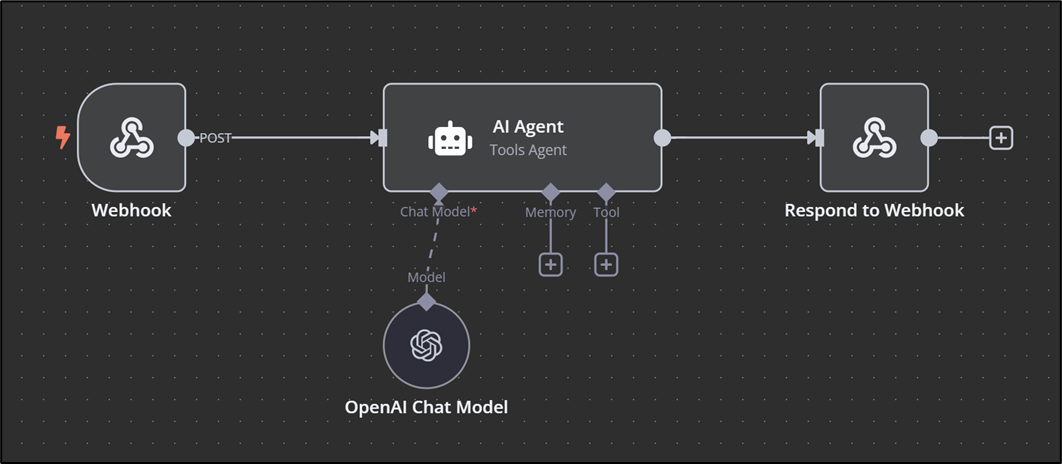
Workflow Setup Steps
Add an "AI Agent" node in n8n:
- Choose a supported language model (e.g., OpenAI Chat Model)
- Enter the required authentication credentials for the model
Configure the AI Agent:
- Open the node's settings
- Set "Source for Prompt (User Message)" to "Define below"
- Enter the expression:
{{ $json.body.text }} - This uses the incoming request text as the input for the AI

TagUI Workflows
TagUI is an open-source RPA (Robotic Process Automation) tool that allows repetitive tasks to be automated. It uses a text-based scripting language to control web interactions, data processing, and other workflows.
TagUI can be executed both locally and on servers and is especially useful for automation tasks without a graphical user interface.
Workflow View
The Workflow View provides an overview of existing TagUI workflows, offers a download link for the tool, and enables linking workflows.
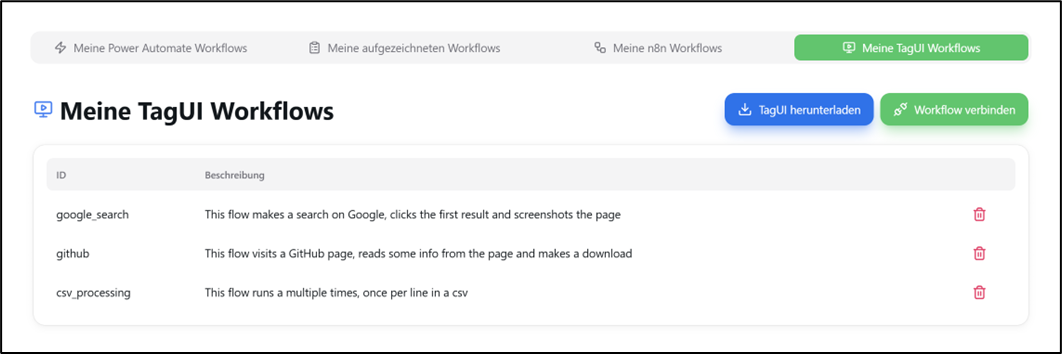
Features:
- Workflow Overview: All existing workflows are displayed in a table format
- Download Tool: The TagUI Runner can be downloaded directly from this view via the "Download TagUI" button
- Add Workflows: To add a new workflow, click "Link Workflow"
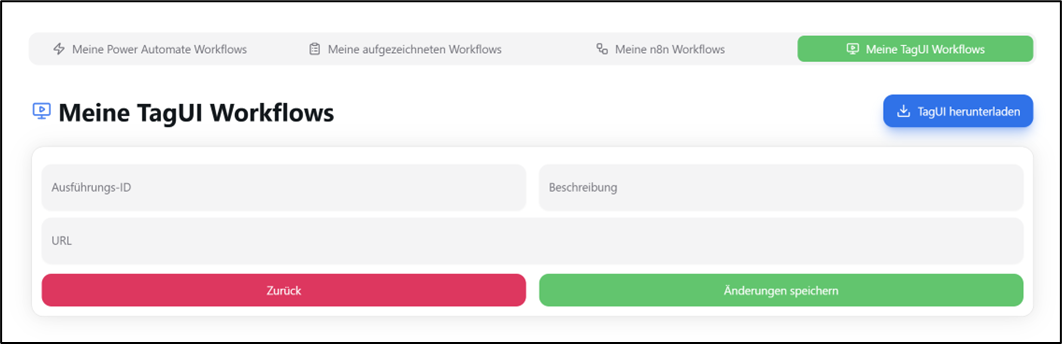
Adding a New Workflow:
- Provide the file path of the TagUI file (*.tag) on your computer
- Example of a valid path:
C:\tagui\flows\samples\1_google.tag
TagUI Runner
The TagUI Runner is a desktop application that executes TagUI workflows locally. It must be installed and running on the machine where the workflows should be executed.
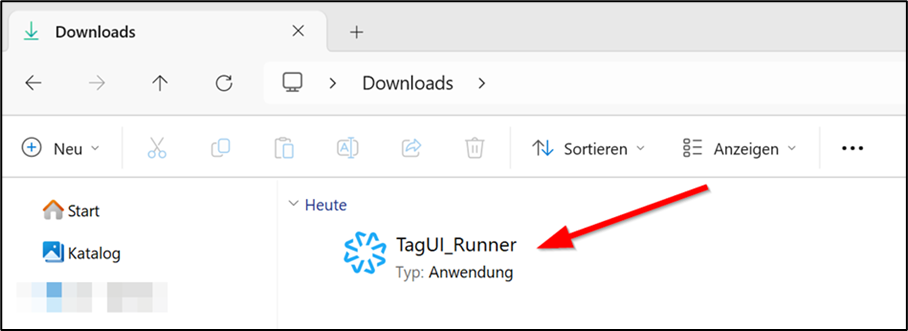
Installation Process:
- Download the TagUI Runner from the plemeo.ai interface
- Install the application on your local machine or server
- Configure the connection to plemeo.ai
- Start the runner service

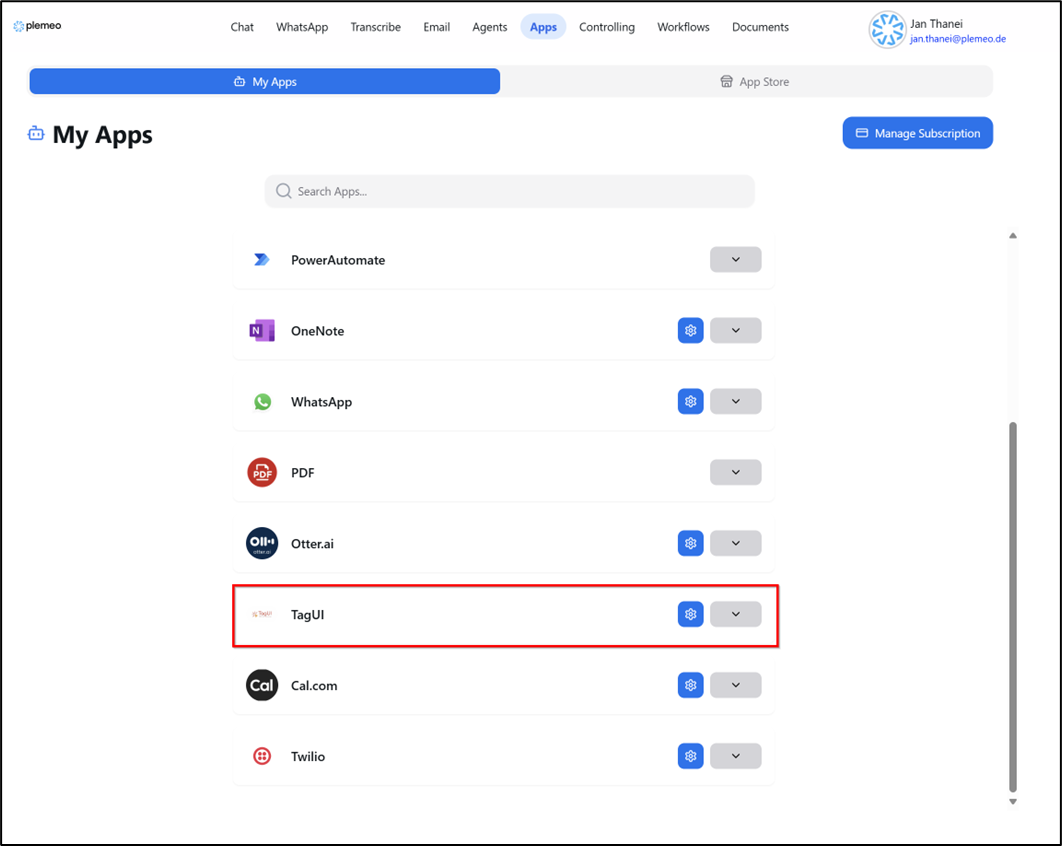
Configuration under "Apps"
In the Apps section of plemeo.ai, you must specify the IP address or URL of the machine where the TagUI Runner is installed.
Execution Modes:
Local Execution
- If the workflow is run on a local computer, it's recommended to use a tool like ngrok to expose the local runner via a public endpoint
Server-based Execution
- If the TagUI runner is hosted on a server, enter the Fully Qualified Domain Name (FQDN) of the server
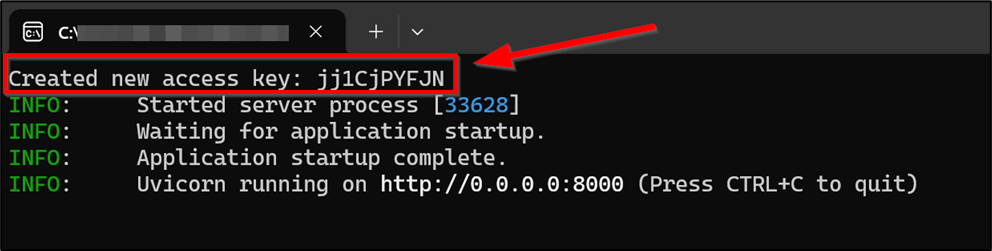
Access Key Configuration: Additionally, the access key generated during the first startup of the TagUI Runner must be entered in this section.

Executing TagUI Workflows from Chat
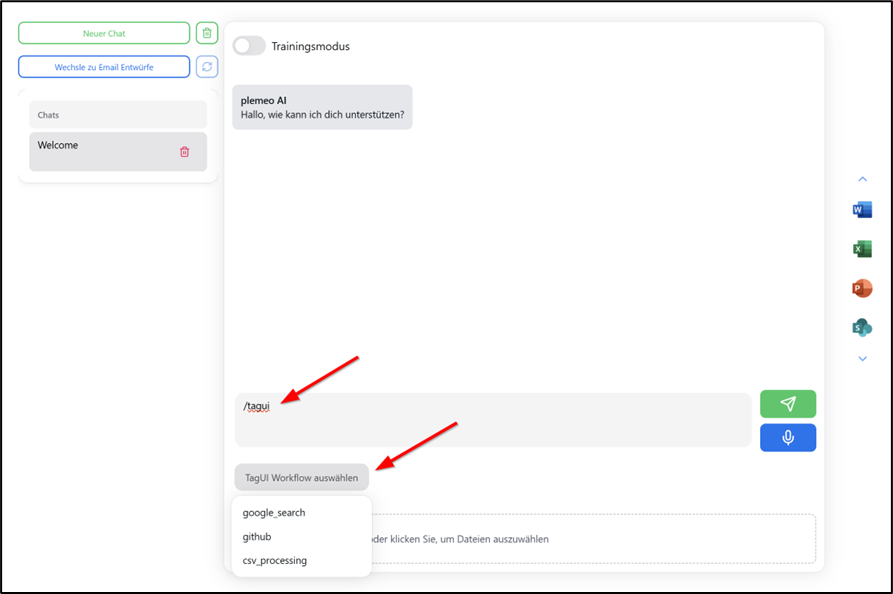
You can run TagUI workflows directly from the chat interface in plemeo.ai:
- Enter the command:
/tagui - Select the desired workflow from the dropdown menu
- The workflow will be executed on the configured TagUI Runner
- Results will be returned to the chat interface