Advanced Configuration
7.1 OpenAI API Key
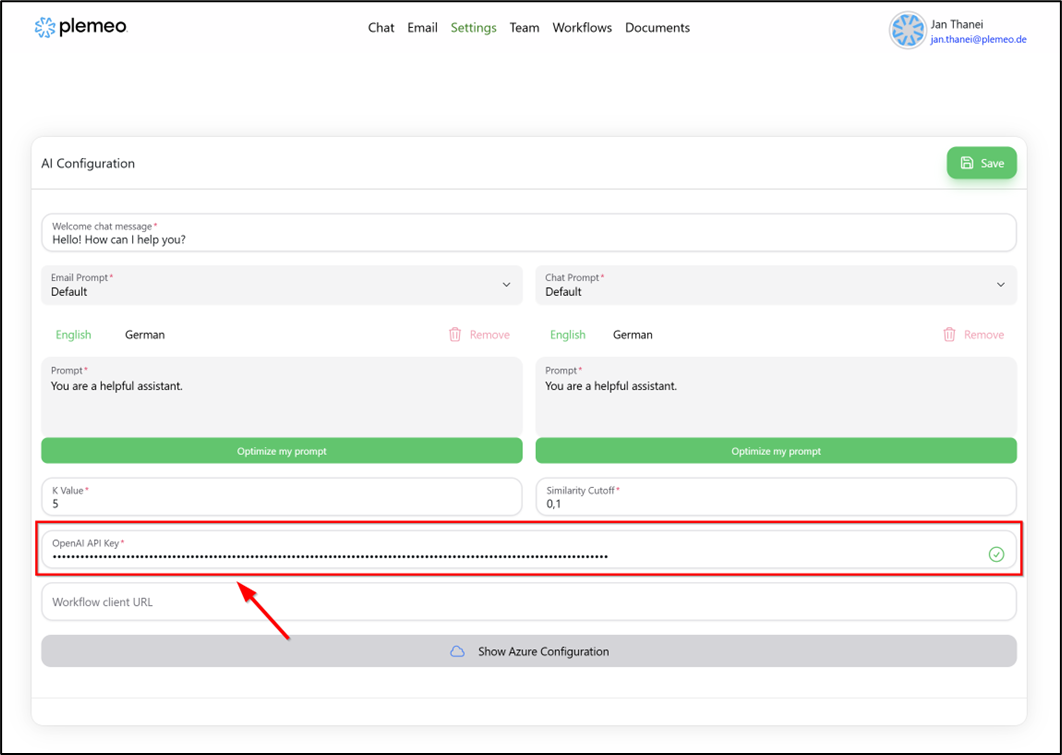
For the LITE version to function, you will be prompted to insert your OpenAI API key on the chat page, as the LITE version uses ChatGPT as the language model to process your requests. You can specify this key in the settings page.
To obtain a key for API usage, follow these steps:
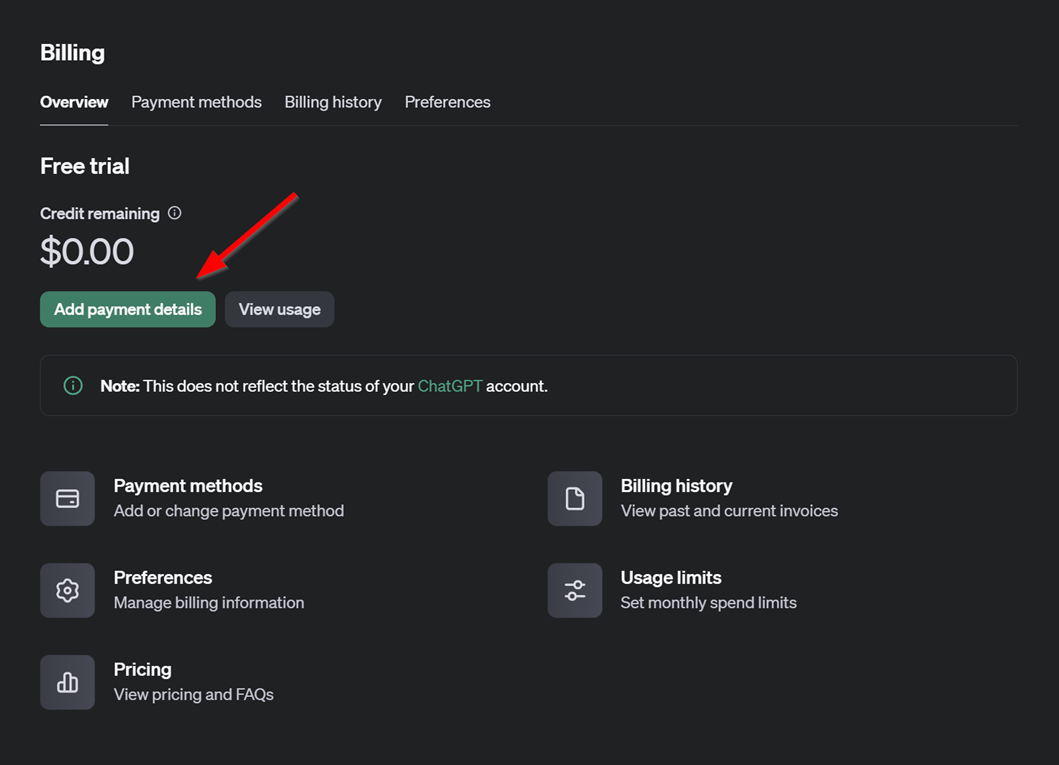
- Visit the OpenAI platform: https://platform.openai.com/settings/organization/billing/overview.
- Add credits to your account to enable API usage, as your credit balance will be consumed when using the API. Ensure that you have sufficient credits available.

- After purchasing credits, retrieve your API key and insert it into the plemeo.ai settings.
- Once the secret key (API key) is created, save it in a secure location, then paste it into the plemeo.ai settings. After this, you are ready to use the chat functionality.
7.2 Azure Configuration
The Azure configuration enables both email functionality and SharePoint synchronization in plemeo.ai. By linking your Azure account, plemeo.ai can access your email and SharePoint data, allowing seamless integration and enhanced productivity through automation.

Steps for Azure Configuration:
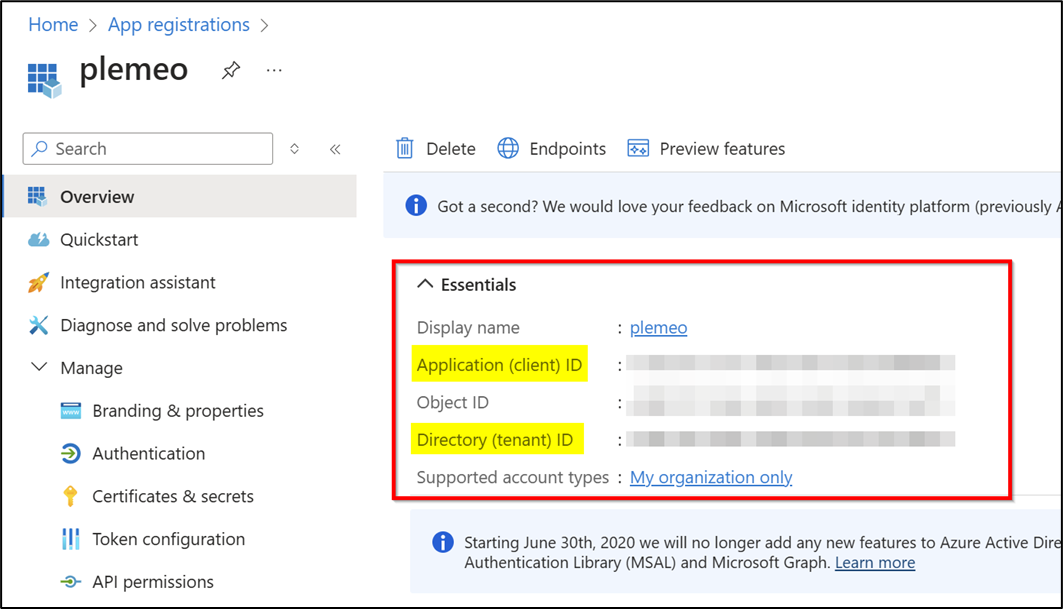
Open the Azure Portal and navigate to App Registrations.
Retrieve the following details from the Azure Portal: • Azure Client ID: Found under the Overview section. • Azure Tenant ID: Also located under the Overview section.
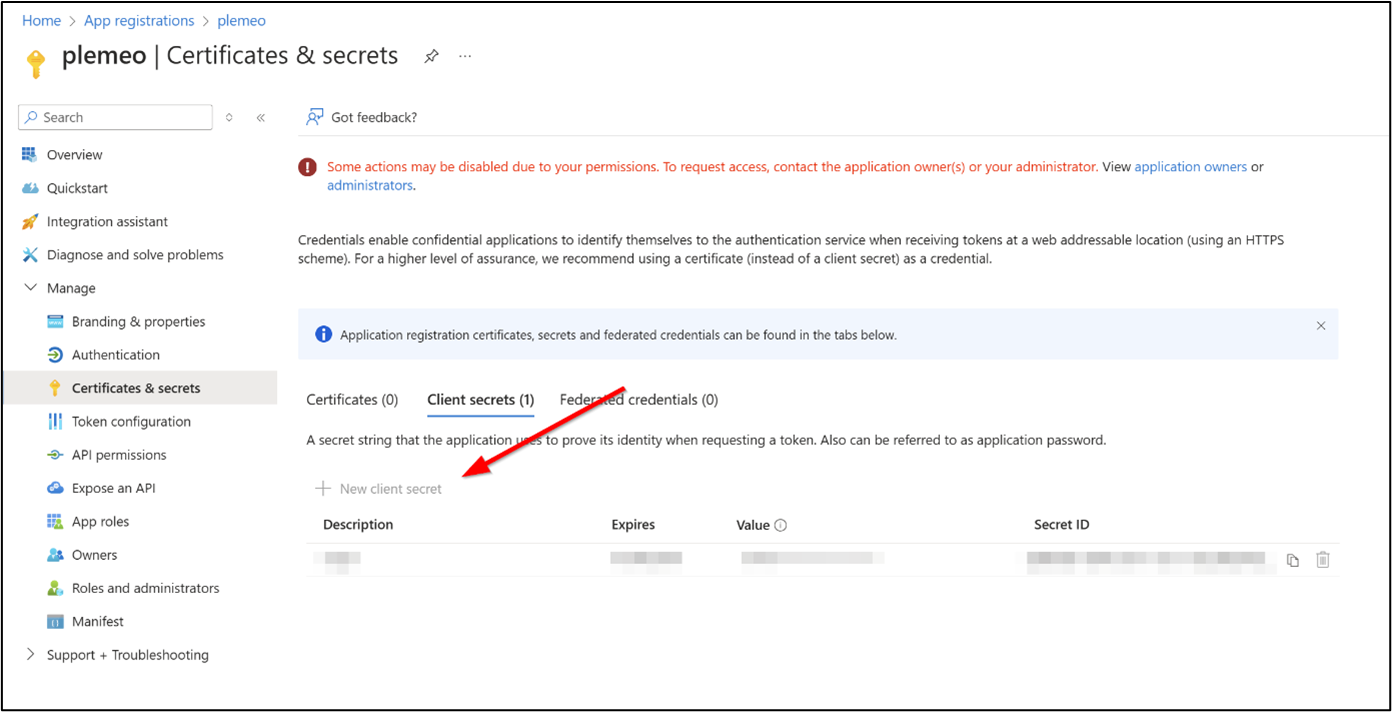
- Generate an Azure Client Secret: This secret key must be created by the administrator. Copy the generated key and paste it into the plemeo.ai configuration.
- In the API Permissions tab, assign the necessary permissions to the plemeo.ai app. These permissions allow plemeo.ai to interact with your email and SharePoint services. The essential permissions are: • Microsoft Graph – Mail.ReadWrite • Microsoft Graph – Mail.Send • Microsoft Graph – Sites.ReadWrite.All • Microsoft Graph – Files.ReadWrite.All
The Delegated permissions are essential for tasks performed on behalf of the signed‑in user, ensuring the correct level of access and security.
- Important: Admin consent must be granted after assigning permissions (via "Grant admin consent" button).

- After these steps, you can proceed to link your email with plemeo.ai under the Email tab.
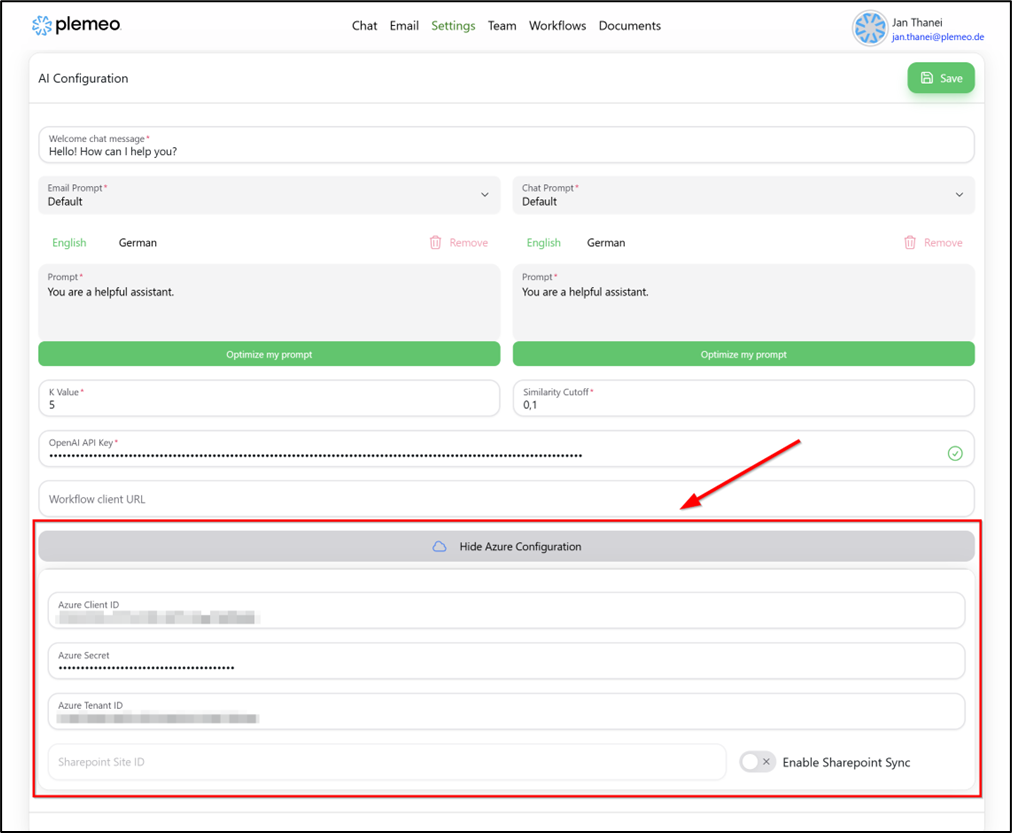
- To activate SharePoint Synchronization, you will need the SharePoint Site ID. Ensure all the required permissions from the previous steps are correctly set.
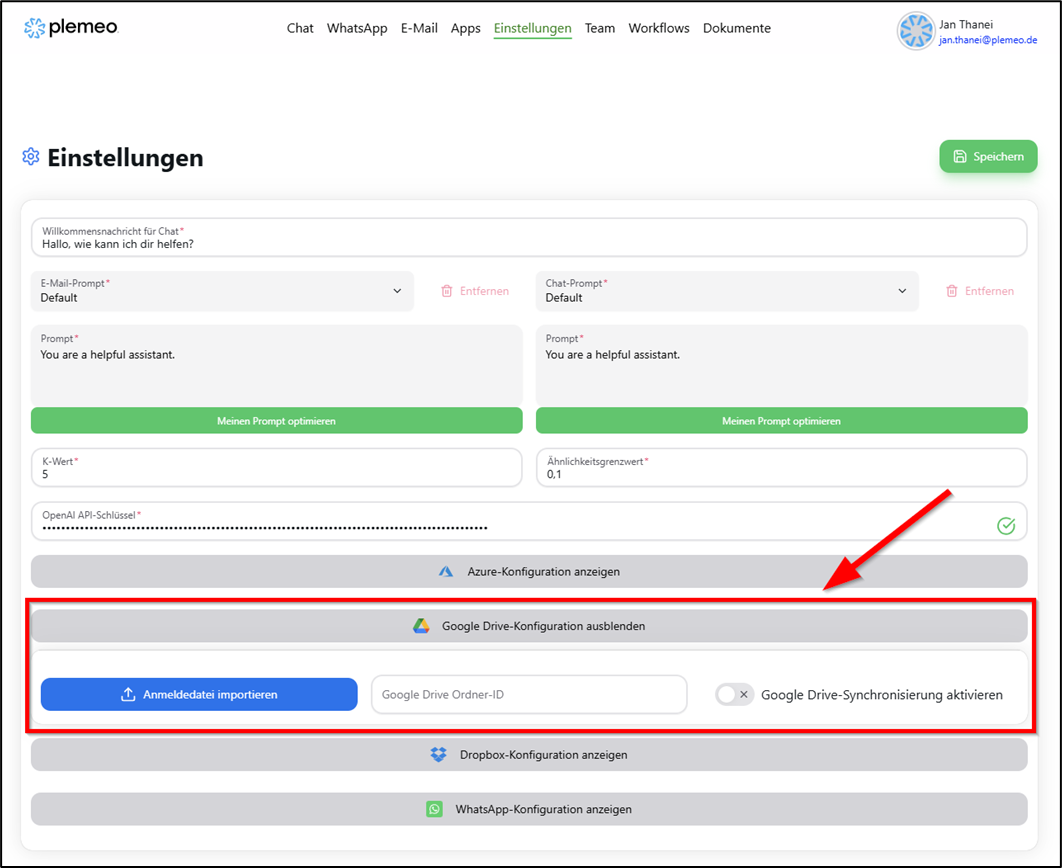
7.3 Google Drive Configuration
To connect plemeo.ai with Google Drive and synchronize files, you need a service account credentials file. With this file, you can link Google Drive so your application can upload, download, or update files. The following step‑by‑step guide shows you how to create this credentials file and integrate it into your application.
7.3.1 Create Credentials File
- Open Google Cloud Console Go to the Google Cloud Console and log in with your Google account.
- Create or select a project Click the project selector at the top left. Create a new project by clicking "New Project" or select an existing one. Give the project a suitable name, such as "Google Drive Sync," and confirm with "Create."
- Enable Google Drive API Navigate to "APIs & Services" > "Library." Search for "Google Drive API," click on it, and enable it by clicking "Enable."
- Create Service Account Go to "APIs & Services" > "Credentials." Click "Create Credentials" and select Service Account. Give the account a descriptive name (e.g., "Drive Sync Service Account") and click "Create and Continue." Next, assign a role such as Project > Editor to grant necessary permissions. Click "Done."
- Download credentials file in JSON format After creating the service account, click its name and go to the "Keys" tab. Click "Add Key" > "Create New Key" and select JSON as the format. The file will be downloaded automatically. Store it safely, as it contains sensitive login information.
- Share service account with Google Drive Open Google Drive and go to the folder you want to sync. Click "Share" and enter the email address of the service account (ends in @your‑project‑id.iam.gserviceaccount.com). Grant at least Editor permissions to allow editing and uploading files.
- Import credentials file into the application Open the application or tool you use for Google Drive synchronization. Click "Import credentials file" and upload the previously downloaded JSON file. This file contains all necessary authentication information to establish the connection with Google Drive.
7.3.2 Folder ID
- Open Google Drive Go to Google Drive and log in.
- Select the desired folder Navigate to the folder you want to sync with plemeo.ai.
- Copy folder ID from the URL The URL will look like: https://drive.google.com/drive/folders/abc123XYZ456. The folder ID is the part after /folders/, e.g., abc123XYZ456
- Paste folder ID into application Insert the copied folder ID into the appropriate field in the application to configure synchronization.
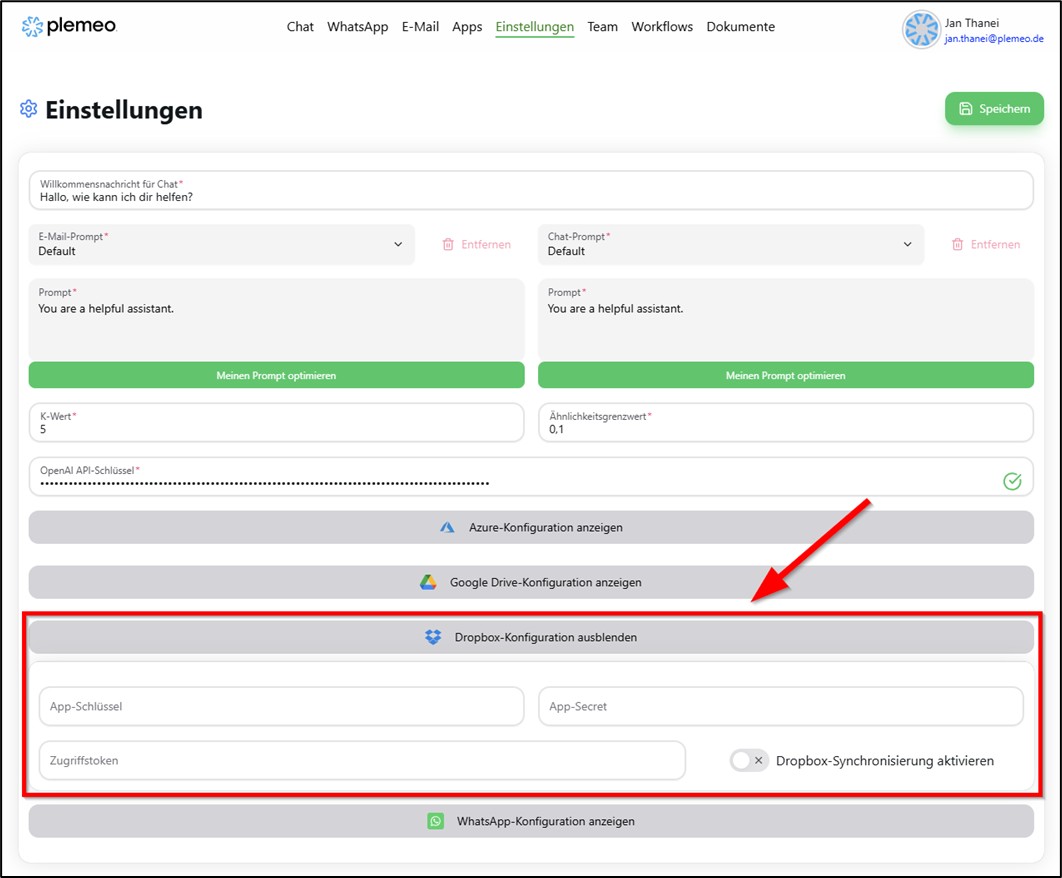
7.4 Dropbox Configuration
To connect your application with Dropbox and synchronize files, you need an App Key, App Secret, and an Access Token. The following guide explains how to get these and complete the configuration.
- Open Dropbox Developer Console Go to Dropbox Developer Console and log in with your Dropbox account.
- Create a new app Click "Create App." Select API type "Scoped access." Choose between "Full Dropbox" or "App folder" depending on the required access scope. Enter a name for your app and click "Create App."
- Get App Key and App Secret Go to the newly created app’s page. In the "Settings" section, you’ll find the App Key and App Secret. Copy both for later use.
- Generate Access Token By default, read permissions are enabled, which are sufficient for synchronization. Then click "Generate Access Token" in the "OAuth 2" section and copy the generated token.
- Set up Dropbox configuration in application Enter the App Key, App Secret, and Access Token into the respective fields of the application. Enable synchronization by toggling the switch "Enable Dropbox Sync."