Phone Numbers
This section covers adding, verifying, and registering phone numbers for WhatsApp Business API usage.

Add Phone Numbers
1. Open WhatsApp Manager
Go to Business Settings > Accounts > WhatsApp Accounts.
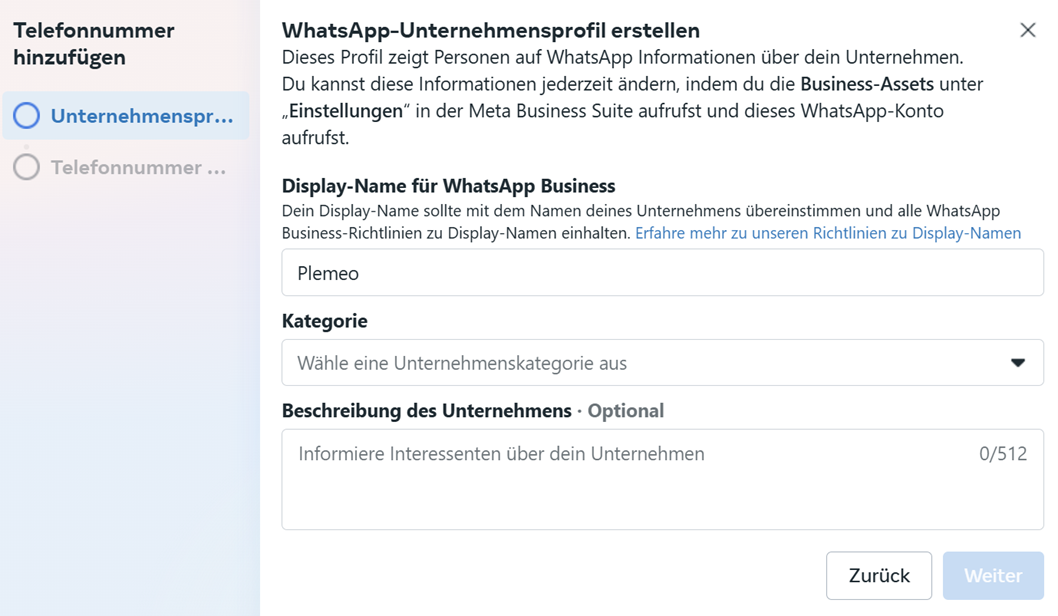
2. Add Phone Number
- Select your WhatsApp account
- Click "Add Phone Number"
- Enter the display name for this number (what users will see in WhatsApp chats)
- Enter your actual phone number
Verify Phone Number
1. Open API Setup
Go to App Dashboard > WhatsApp > Getting Started > API Setup.
2. Select the Phone Number
Choose the number to verify.
3. Choose Verification Method
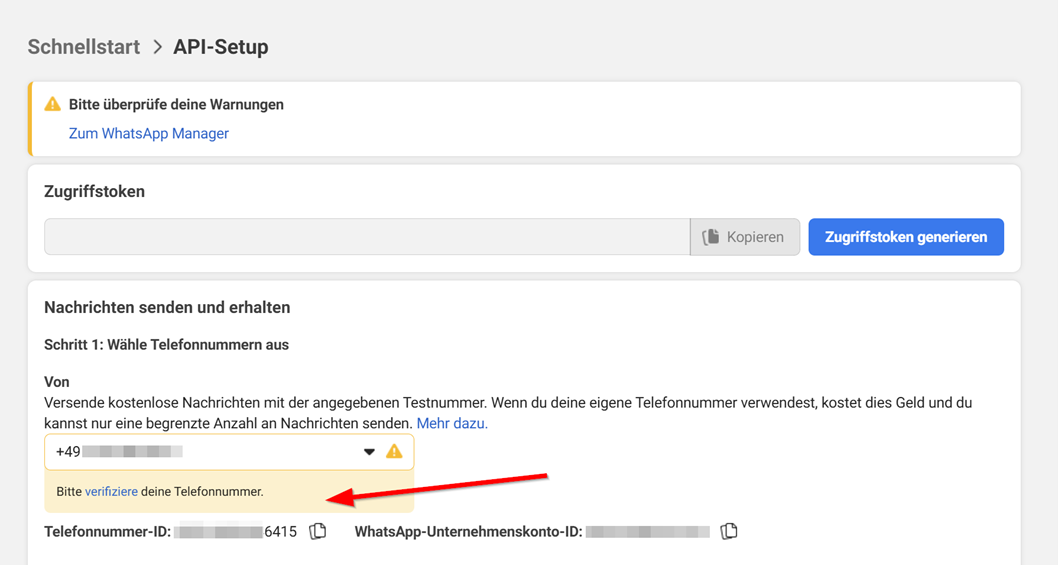
- Click "Verify"
- Select whether to receive the code via SMS or phone call
- Enter the received code to activate the number
4. Copy Phone Number ID
- This ID appears under the number in API Setup
- Save it for future API interactions
Register Phone Number
To fully register your phone number with the WhatsApp Business API, an API call is required. This ensures the number is correctly linked and usable via the API. You will need:
- The phone number ID (from the previous step)
- The permanent access token (from earlier)
Steps
1. Install Postman
Download and install Postman to easily make the API request.
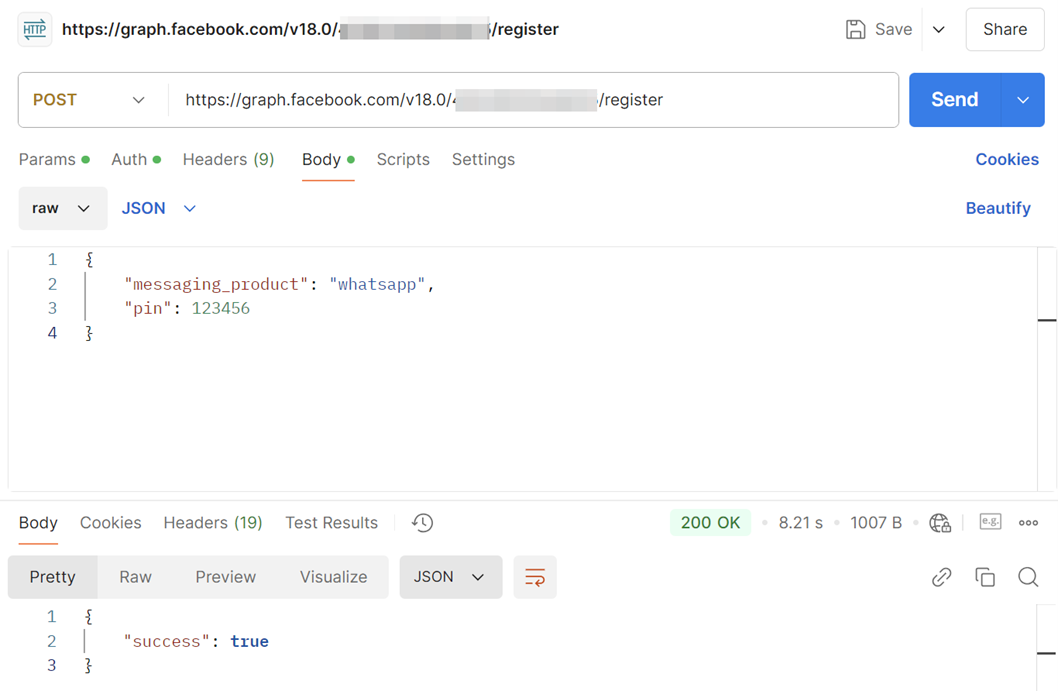
2. Create a New API Request in Postman
- Method: POST
- URL:
https://graph.facebook.com/v18.0/<phone-number-id>/register - Replace
<phone-number-id>with your actual ID
3. Add Header
- Key: Authorization
- Value:
Bearer <permanent-access-token> - Replace
<permanent-access-token>with your actual token
4. Set Request Body
json
{
  "messaging_product": "whatsapp",
  "pin": 123456
}
Choose raw JSON format. Replace 123456 with any 6-digit PIN of your choice. It will not be used again.
5. Send Request
- Click "Send"
- If successful, you'll receive a confirmation response
What's Next?
After successfully adding, verifying, and registering your phone numbers, proceed to:
- plemeo.ai Configuration - Configure WhatsApp in plemeo.ai
- Back to Overview - Return to WhatsApp setup overview